

All of the information to give a corner banquette a new glance with paint, as well as how to install an air vent redirect under a cupboard.
Last but not least!
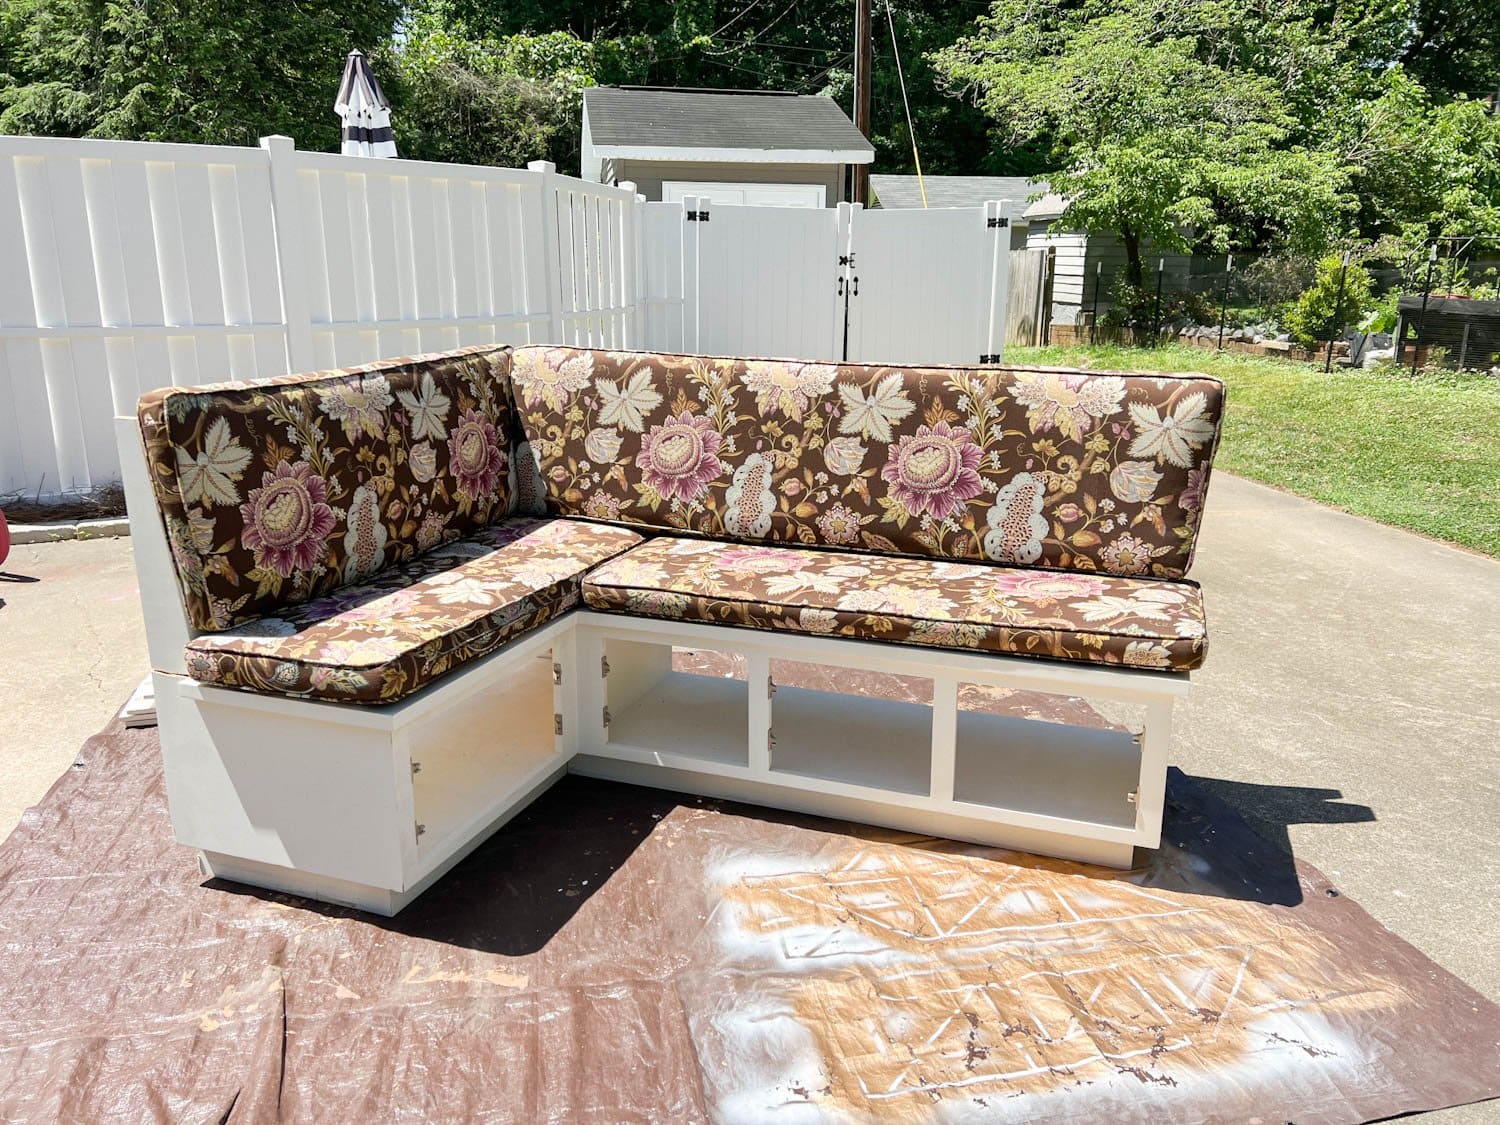
Following months of browsing for a secondhand corner banquette on Facebook Market, driving just about 4 hrs spherical-vacation to decide on it up, shifting a door, setting up LVP flooring, redirecting an air vent, and portray for times, we have the slight makings of breakfast nook!

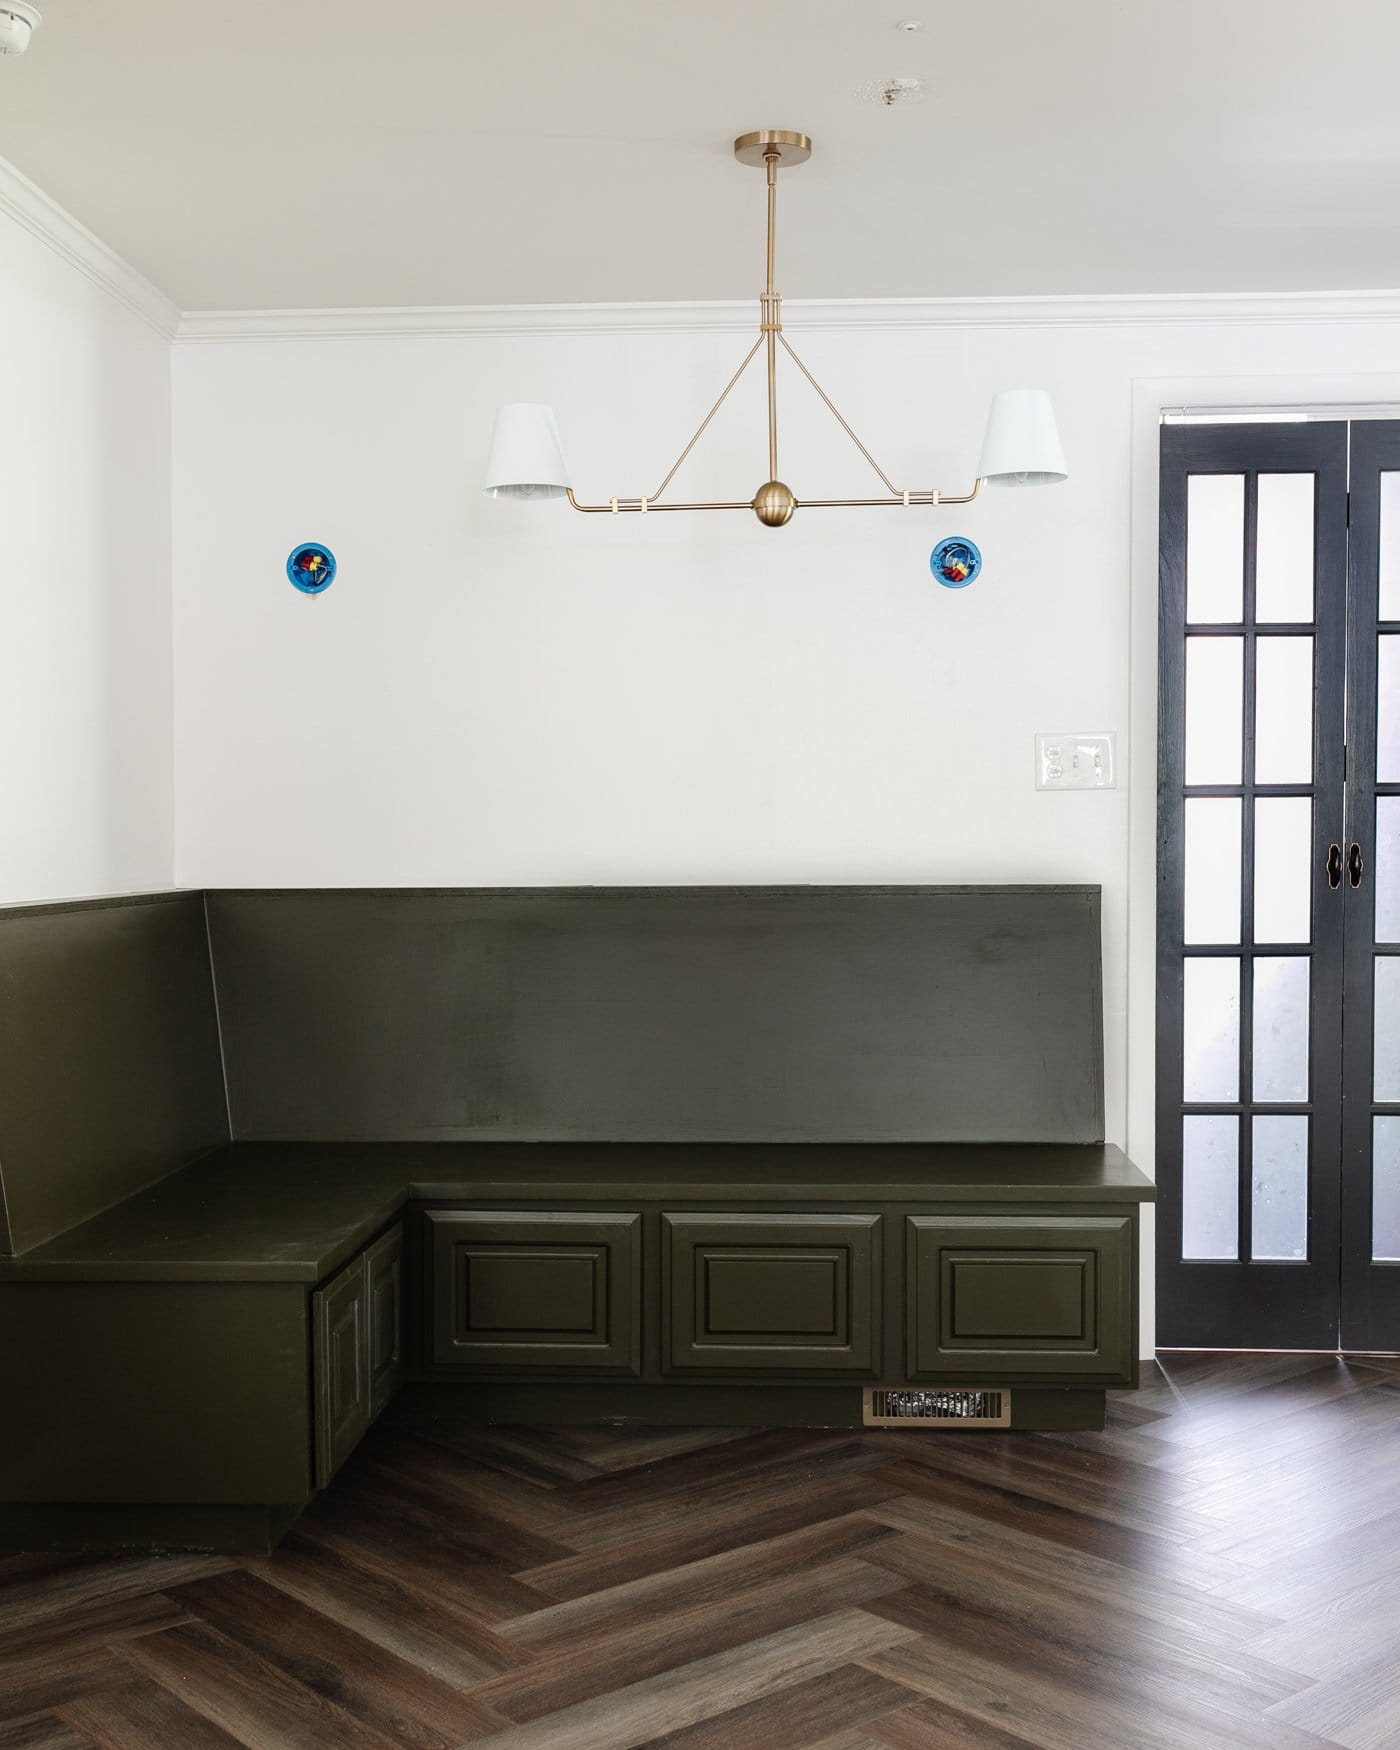
I managed to shoot the banquette’s new digs ideal just after the electrician still left from setting up all those sconce bins and relocating for the linear chandelier, so forgive the dust. 😉
I’m even now waiting on reupholstered cushions, but even “naked” this banquette by now has us envisioning so numerous fun loved ones dinners gathered all-around the table with lots of more liked kinds squeezed into this small room!
How to Redirect Air Vents Beneath Cupboards
Just one tiny obstacle we had to tackle ahead of earning the shabby corner banquette look stylish was rerouting the air vent on the flooring that was positioned right beneath the underneath seat the cupboards.
(There always has to be at the very least one obstacle or it wouldn’t be a dwelling improvement project, would it? Murphy’s Law each and every time.)
If you are ever creating built-in cabinets, cabinets, a window seat, or a corner banquette like ours, you absolutely just can’t go over and overlook any vents the air flow have to be redirected to continue to keep the home correctly heating and cooling.


How to Put in an Air Vent Redirect
We made use of this air vent redirecting package named a Toe Ductor (it operates for wall registers and baseboard registers way too).
The package enables you to thrust the air circulation beneath your created-in home furnishings. (Not sponsored… just a awesome thing we’ve found and made use of for DIYs more than the decades.) Make guaranteed you allow at least 4 inches of place underneath your cabinet or constructed-in.
We did the same underneath the constructed-in cupboards and window seat for our neighbors’ rec room makeover past 12 months. In hindsight, I would paint that vent grate to blend it.

Supplies
- Toe Ductor Package (wall vent kit below or baseboard vent kit here)
- Drill
- 1/2″ wooden screws
- Oscillating instrument
- Duct tape

Move 1 – Connect Box to Floor Vent
Protect the flooring vent very first with the Toe Ductor box and screw into spot.

Action 2 – Measure and Cut for the Toe Kick Deal with
Come to a decision where by you want to area the new air vent on your designed-in, measure, and mark. Working with the oscillating software, minimize out a rectangular part.


Stage 3 – Attach the New Vent
On the bottom of the rectangular gap you just reduce, connect the new vent with screws to the toe kick.

Action 4 – Connect Adaptable Duct
Use the delivered steel strip to connect the versatile duct to the again of the vent. (Our steel strip set up a bit of a battle, so we reinforced it with duct tape.)

Move 5 – Attach Flex Duct to Box and Position Cabinet/Built-In on Prime
Extend out the flexible duct underneath the corner banquette created-in, and connect it to the box on the ground with the kit’s metal stripping. We reinforced ours all over again with duct tape so no air escapes.
Location the cupboard or built=in on top of the box and anchor to the wall as you’d like. You can attach the toe kick grate to the front just after painting.
Stage 6 – Prep and Paint
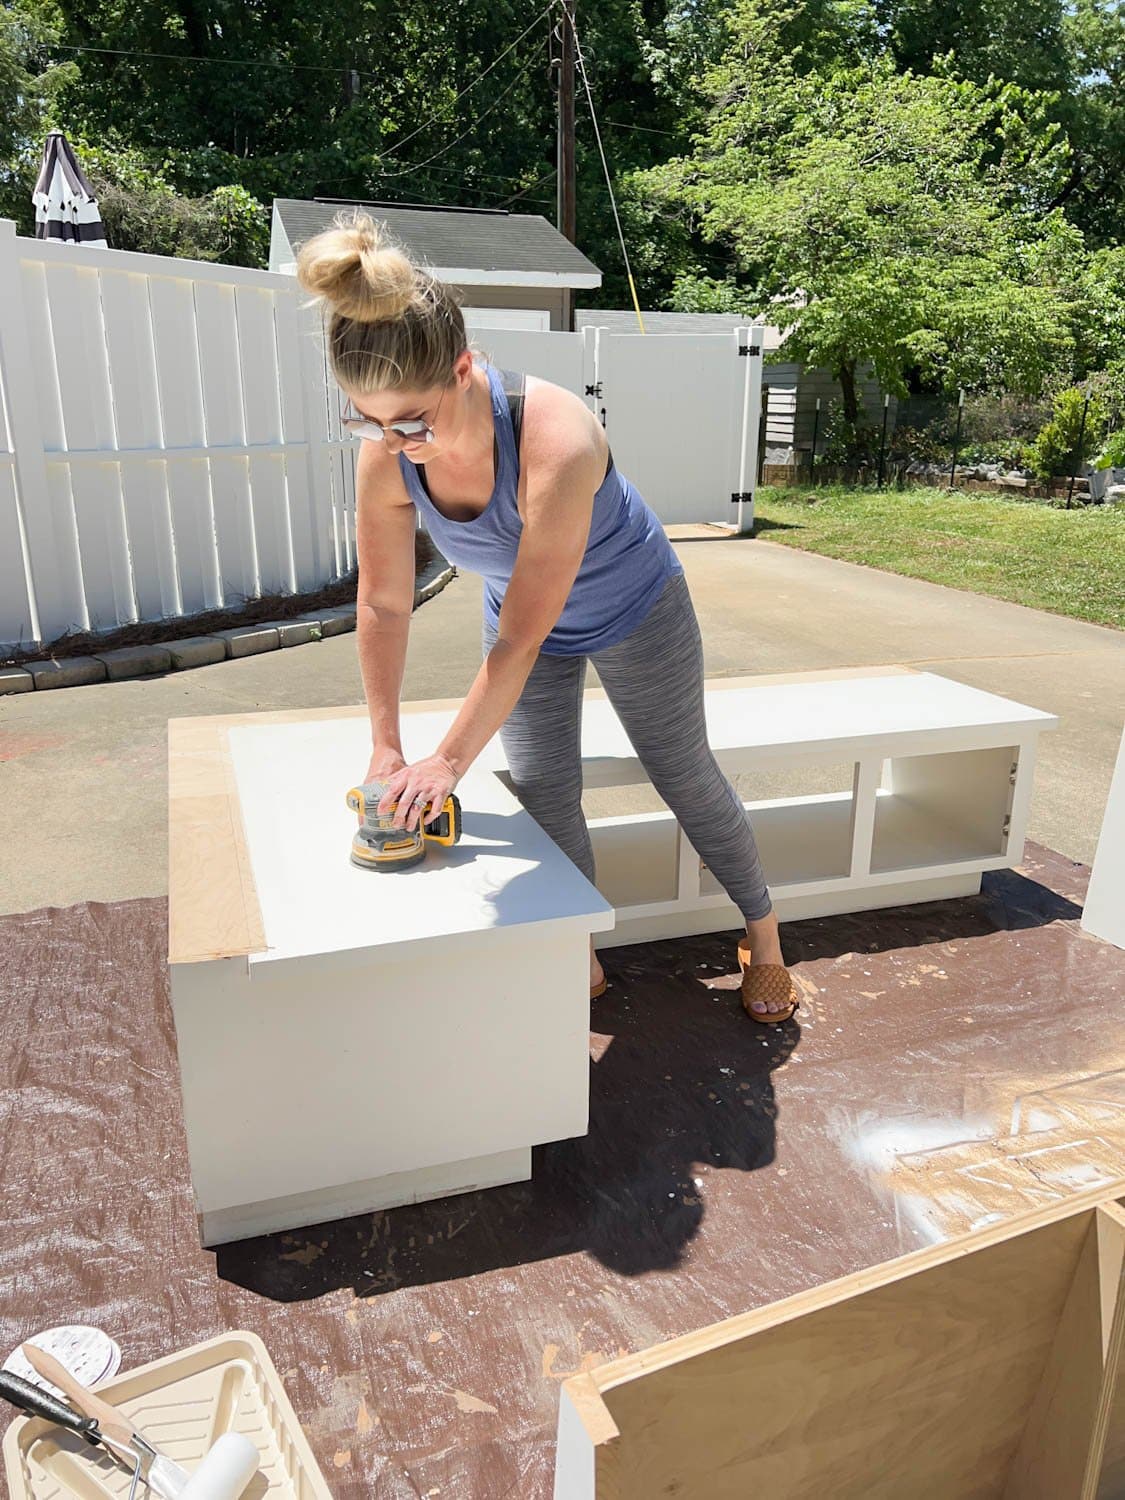
I went by way of my common cupboard painting course of action due to the fact this corner banquette is really a great deal like a piece of cabinetry.
- Sand with an orbital sander working with medium/great grit
- Vacuum and tack cloth away dust
- Use liquid sander deglosser
- Primary with shellac centered primer
- Paint with enamel satin

Examine out that deep, desaturated olive green! It blends properly with our additional vivid hunter environmentally friendly kitchen area cabinets whilst even now experience like a neutral. Appreciate! The shade is Benjamin Moore Southern Vines.
We anchored the new-to-us corner banquette to the wall while we were being at it so the little ones can get tough and rowdy on this bench all they want.


The Painted Corner Banquette
I are unable to hold out to see some really striped cushions on this bench before long, but it appears so very good now!
This linear chandelier is perfect for the slender rectangular eating table that will go here quickly. Since this house is windowless, and this corner feels so darkish, we included sconce packing containers to give it some added assist.

I prepare to go again and paint the vent deal with the exact same Benjamin Moore Southern Vines to mix with the relaxation of the corner banquette so it will just about vanish.
Are you starting to see the vision just take form in this tiny eating nook? Are we feelin’ the bench seating problem? We have an cheap wall therapy prepared subsequent to incorporate some further dimension that I can not wait around to display you!
More Furniture Tips


More Stories
Home Staging Strategies
Tips For Applying Professional Looking Stage Make Up For Dancers
Renting Vacation Homes for Newbies